Want to turn your passion for writing into a source of income? If you’re running a Jekyll-powered website or blog, adding Google AdSense is a fantastic way to monetize your content. While Jekyll is known for its simplicity and speed, integrating external services like AdSense can sometimes seem daunting. But fear not! This guide will walk you through the process step-by-step, ensuring you can seamlessly add AdSense to your Jekyll site.
Why Use Google AdSense with Jekyll?
- Earn Revenue: Generate income from your website traffic.
- Easy Integration: While it requires a few steps, it’s relatively straightforward.
- Targeted Ads: Google’s algorithms display relevant ads to your audience.
- Customization: Control ad placement and appearance.
Prerequisites
- A Google AdSense account (apply at google.com/adsense)
- A Jekyll website or blog.
- Access to your website’s HTML files.
Step 1: Get Your AdSense Code
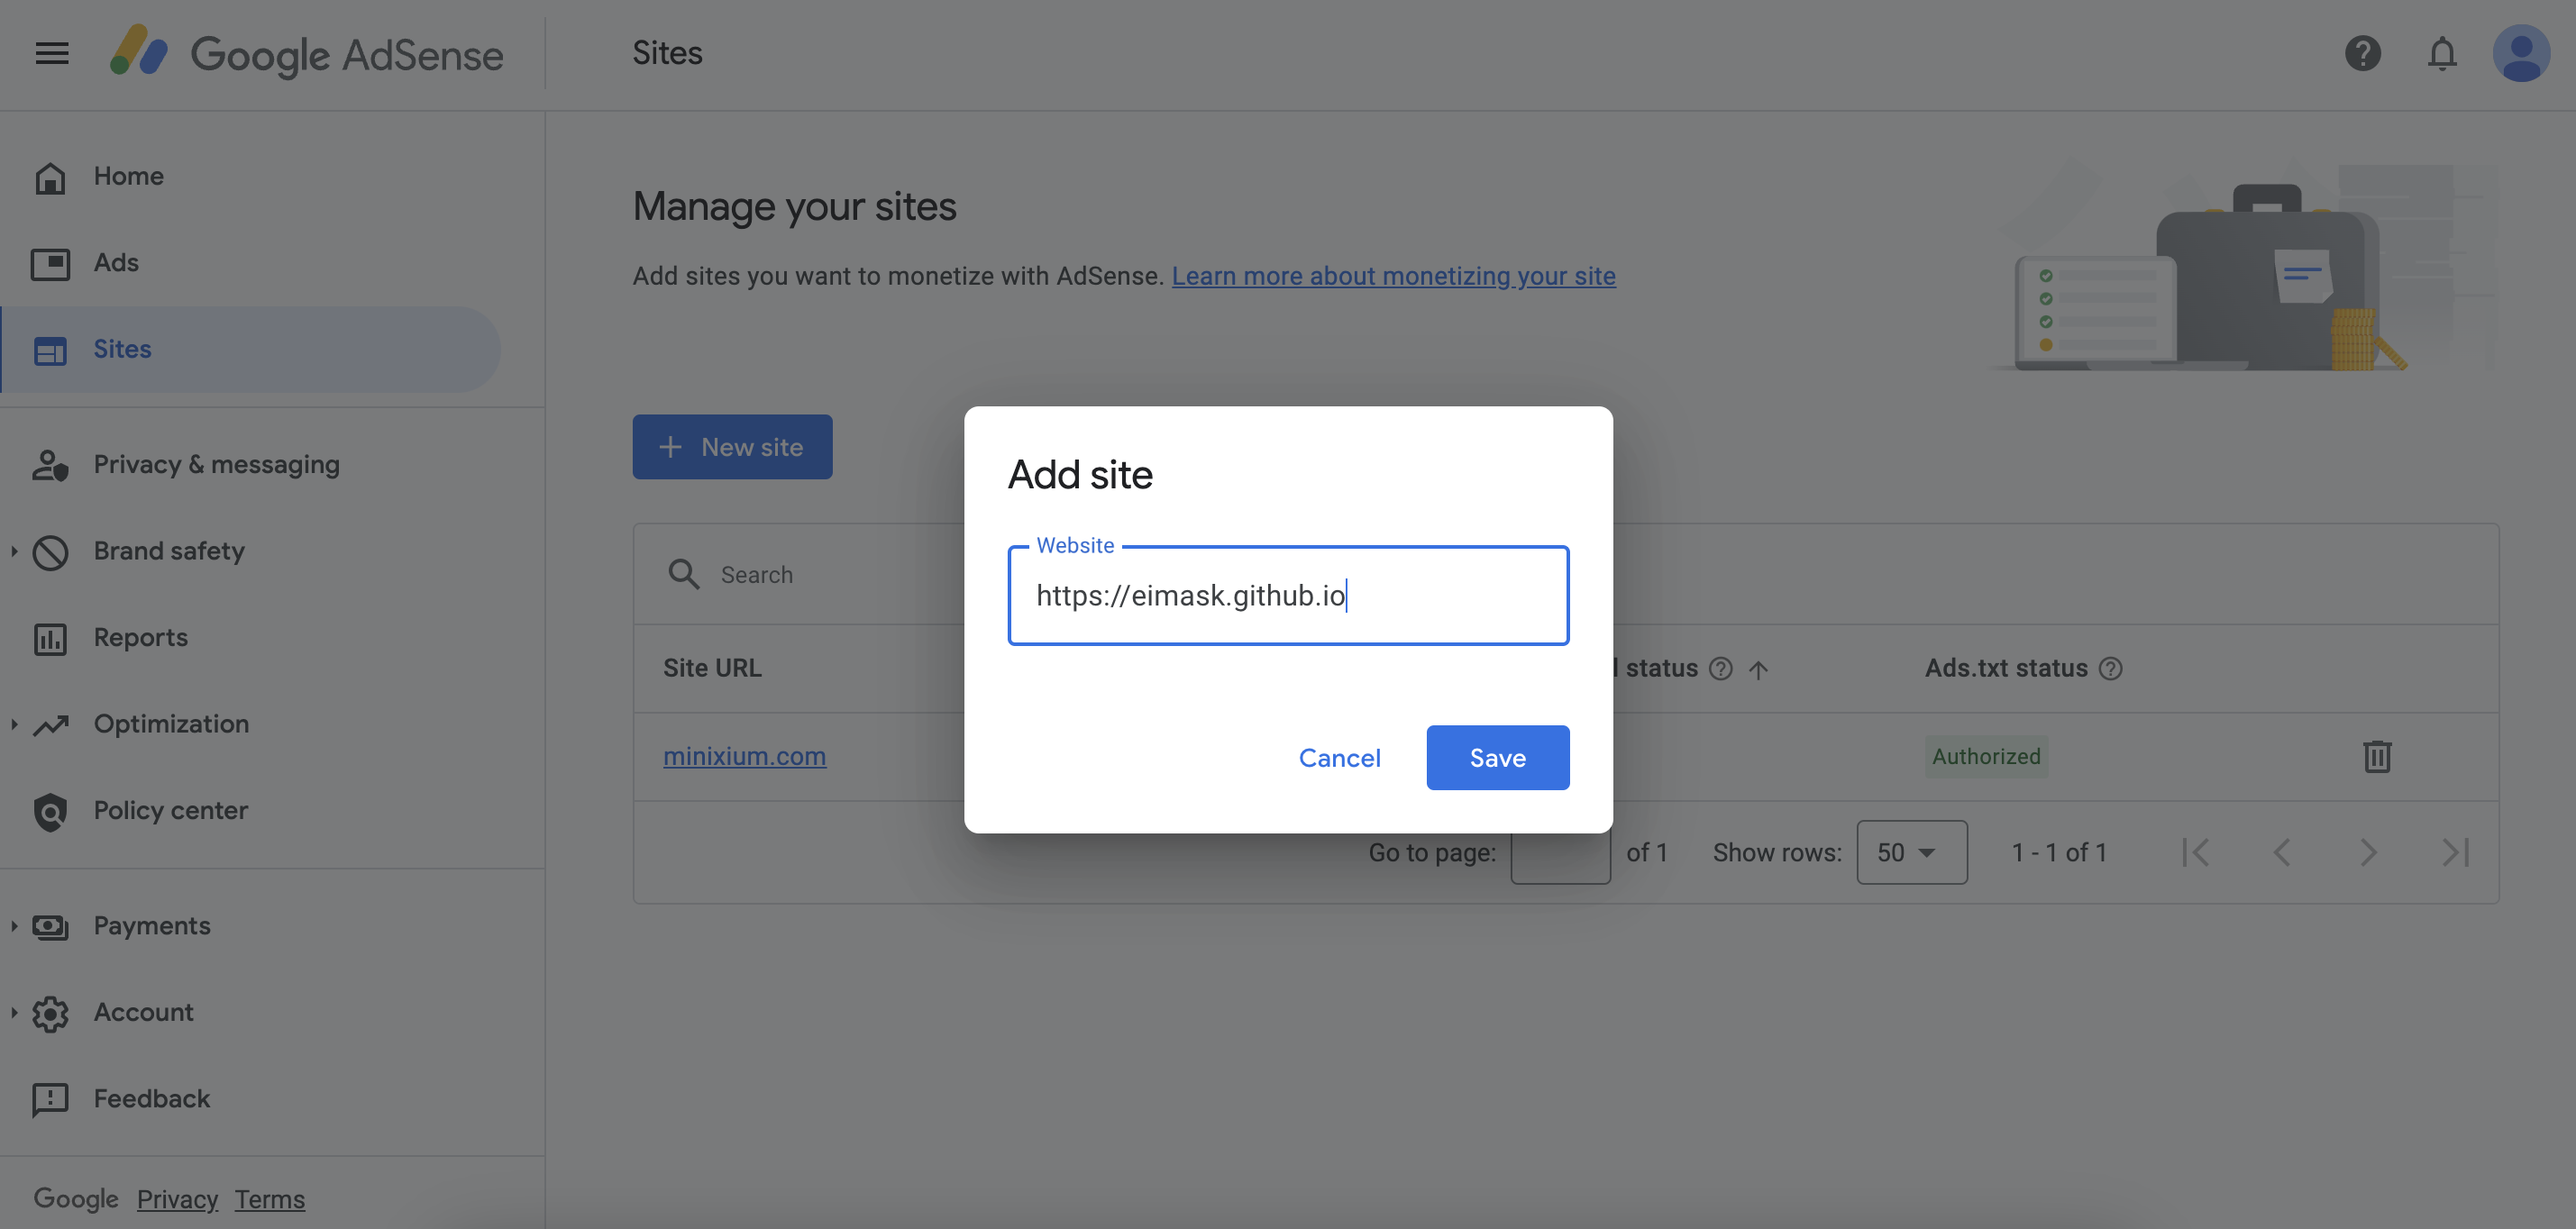
- Sign in to your Google AdSense account https://adsense.google.com/start/.
- Navigate to
Site>New site
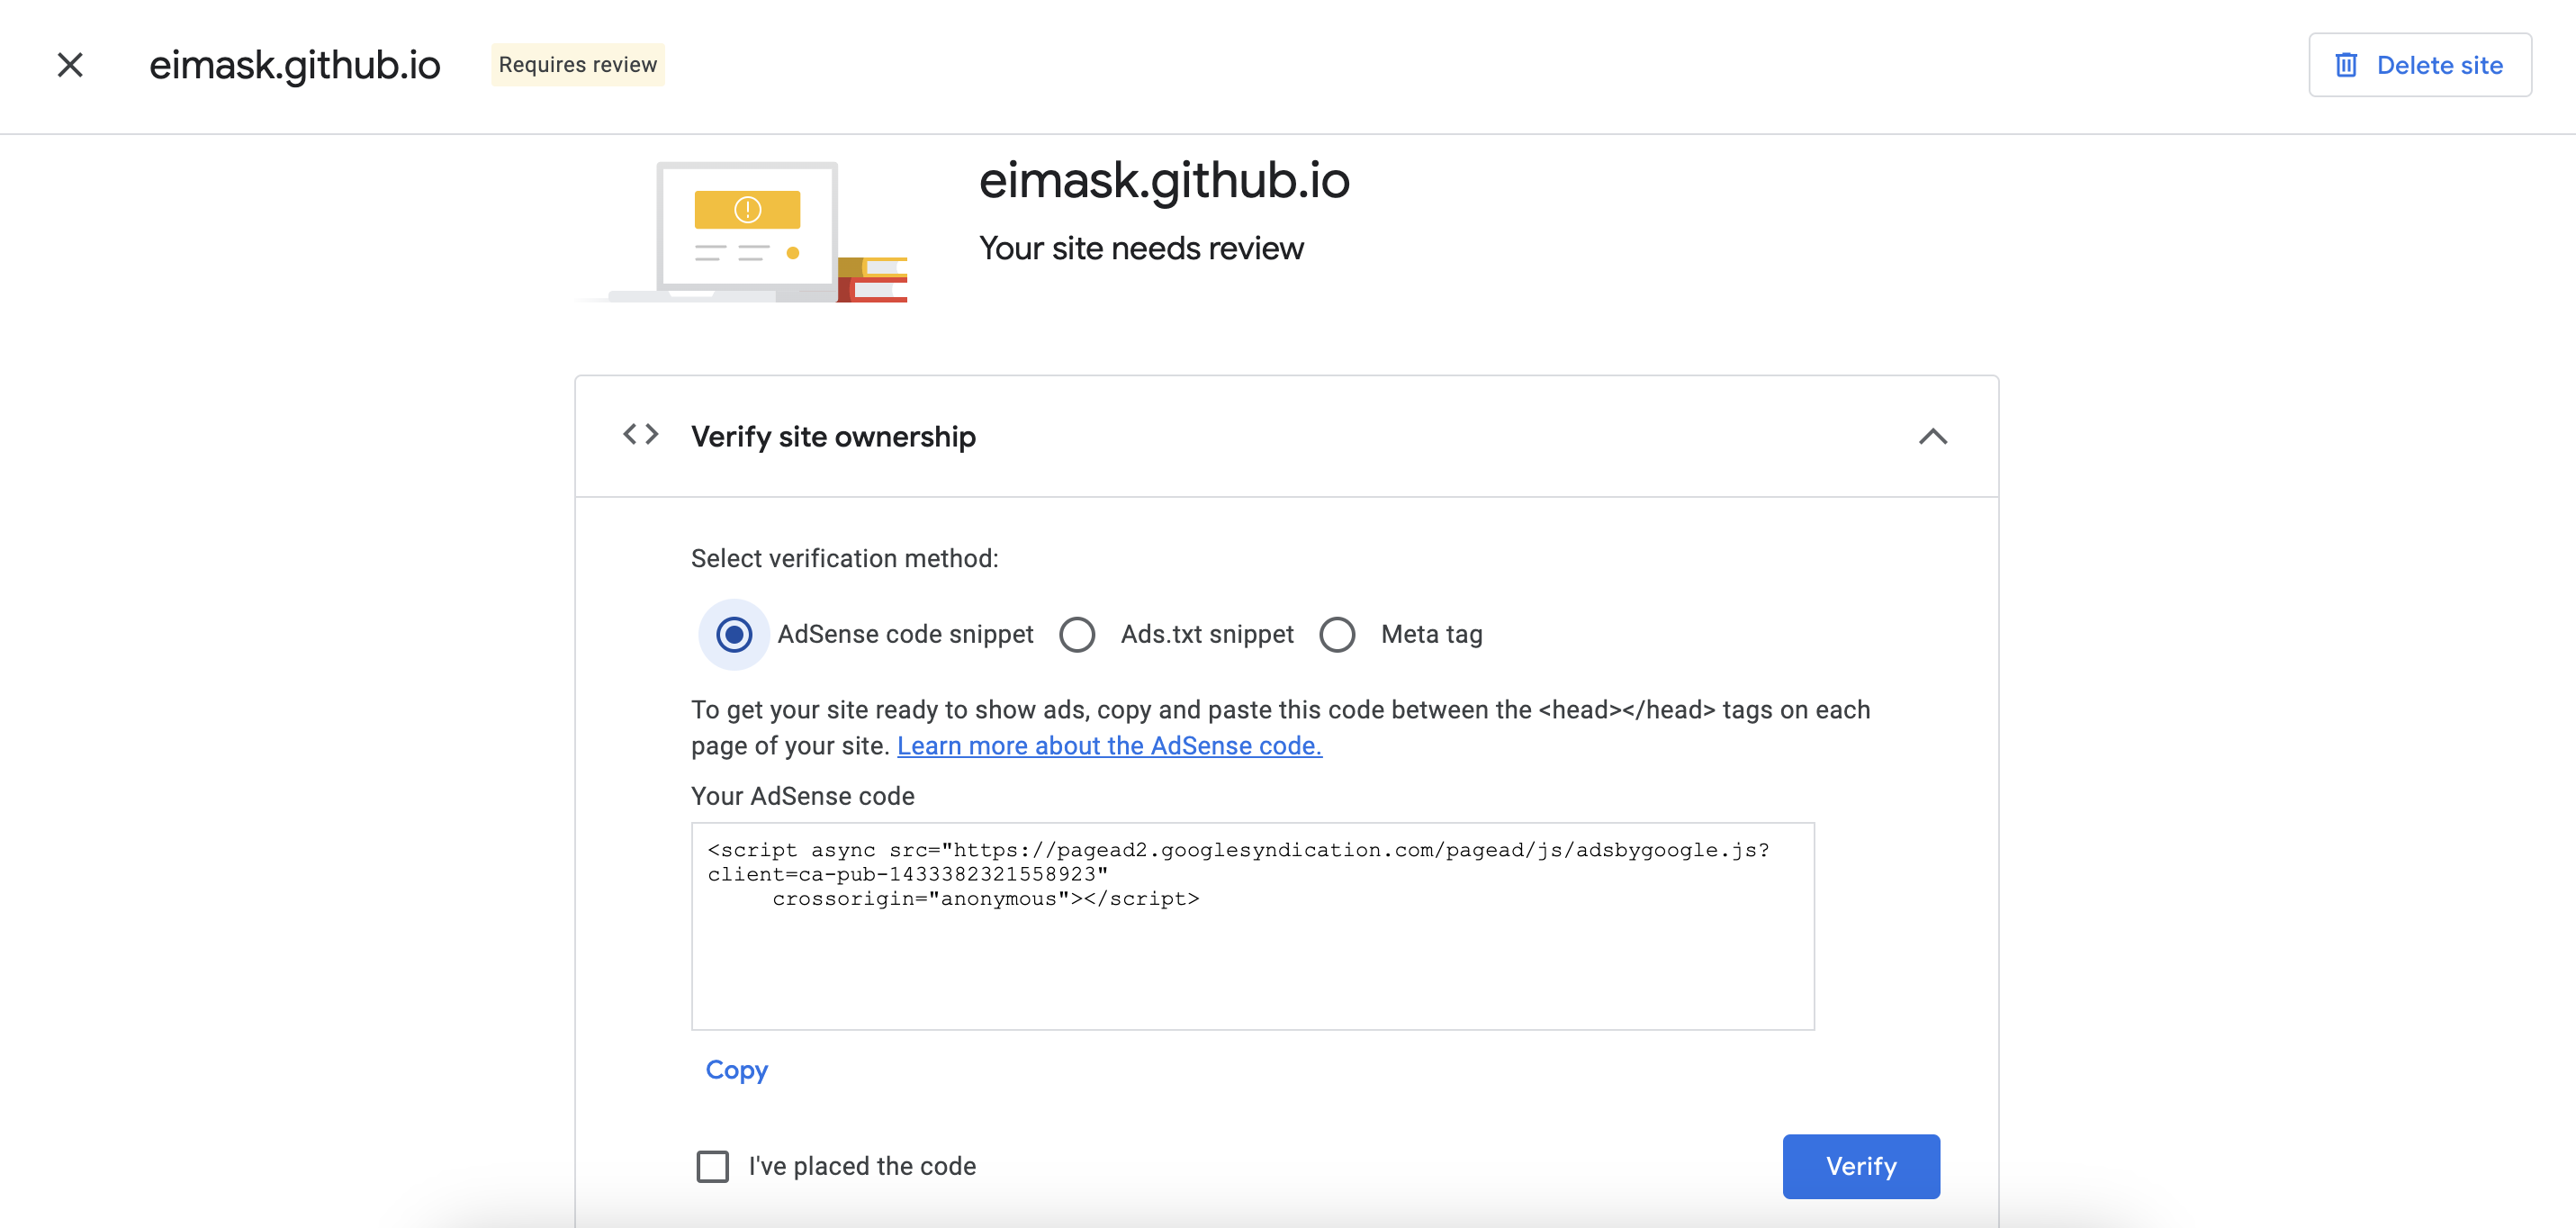
- Choose an verification method (e.g.,
Adsense Code snippet,Ads.txt snippet,Meta tag.)
Step 2: Add Verification Code to Jekyll website
Using Adsense Code snippet
- Create
_includesfolder at your Jekyll project
cd [your-jekyll-project]mkdir _includes- Create
head.htmlfile in_includesfolder.
touch head.html- Copy and paste all content of
head.htmlin this link: https://github.com/cotes2020/jekyll-theme-chirpy/blob/master/_includes/head.html - Create
google-adsense.htmlfile in_includesfolder.
touch google-adsense.html- Edit
google-adsense.htmlfile with your Google Adsense Snippet above.
<script async src="https://pagead2.googlesyndication.com/pagead/js/adsbygoogle.js?client=[your-ca-pub-id]" crossorigin="anonymous"></script>- Edit
head.html:
<head> <!--some code above--> {% include metadata-hook.html %} <!--add this line--> {% include google-adsense.html %} </head>Using Ads.txt snippet
- Create
ads.txtfile in your Jekyll project:
touch ads.txt- Edit
ads.txtfile with your Ads.txt snippet.
Using Meta tag
- Edit
head.htmlfile in_includesfolder. - Add Google Adsense meta tag insite
<head>tag:
<head> <meta http-equiv="Content-Type" content="text/html; charset=UTF-8"> <meta name="theme-color" media="(prefers-color-scheme: light)" content="#f7f7f7"> <meta name="theme-color" media="(prefers-color-scheme: dark)" content="#1b1b1e"> <meta name="mobile-web-app-capable" content="yes"> <meta name="apple-mobile-web-app-status-bar-style" content="black-translucent"> <!--add this line--> <meta name="google-adsense-account" content="[your-meta-tag]"> <meta name="viewport" content="width=device-width, user-scalable=no initial-scale=1, shrink-to-fit=no, viewport-fit=cover" > <!--some remain code--></head>Step 3: Verify code and monitoring
- AdSense Verification: Google will review your site to ensure it complies with their policies. This may take some time.
- Check Ad Display: Once approved, ads should start appearing on your site.
- Monitor Performance: Use your AdSense dashboard to track your earnings and ad performance.
- Optimize Ad Placement: Experiment with different ad placements to maximize revenue.
Tips for Success
- Content is King: Focus on creating high-quality, engaging content.
- Responsive Design: Ensure your website and ads are responsive across devices.
- Ad Placement Optimization: Avoid placing too many ads or ads that disrupt user experience.
- AdSense Policies: Adhere to Google’s AdSense policies to avoid account suspension.
Conclusion
Adding Google AdSense to your Jekyll website is a straightforward process that can help you monetize your content. By following these steps and optimizing your ad placement, you can start earning revenue from your hard work. Remember to prioritize user experience and create valuable content to maximize your earnings. Happy monetizing!- Back to Google Adsense page and click Verify button.