MuleSoft Best Practices: Leveraging Global Elements and Properties Files
Learn how to manage complex MuleSoft configurations with global elements and properties files. Simplify your project and streamline your development process.
What are Global Elements and Properties Files?
- Global Elements: Reusable MuleSoft components (e.g., connectors, configurations) defined once and used throughout your project. This promotes consistency and reduces redundancy.
- Properties Files: External files where you store frequently used values (e.g., database credentials, API endpoints). Updating these files is simpler and safer than changing code.

Why Use Them?
- Maintainability: Make configuration changes in one place, and they'll update throughout your project.
- Flexibility: Use different property files to adapt to different environments (development, testing, production).
- Security: Protect sensitive information by storing it outside your application code.
Setting Up Global Elements and Properties in Anypoint Studio
1. Create a Global Elements Configuration File:
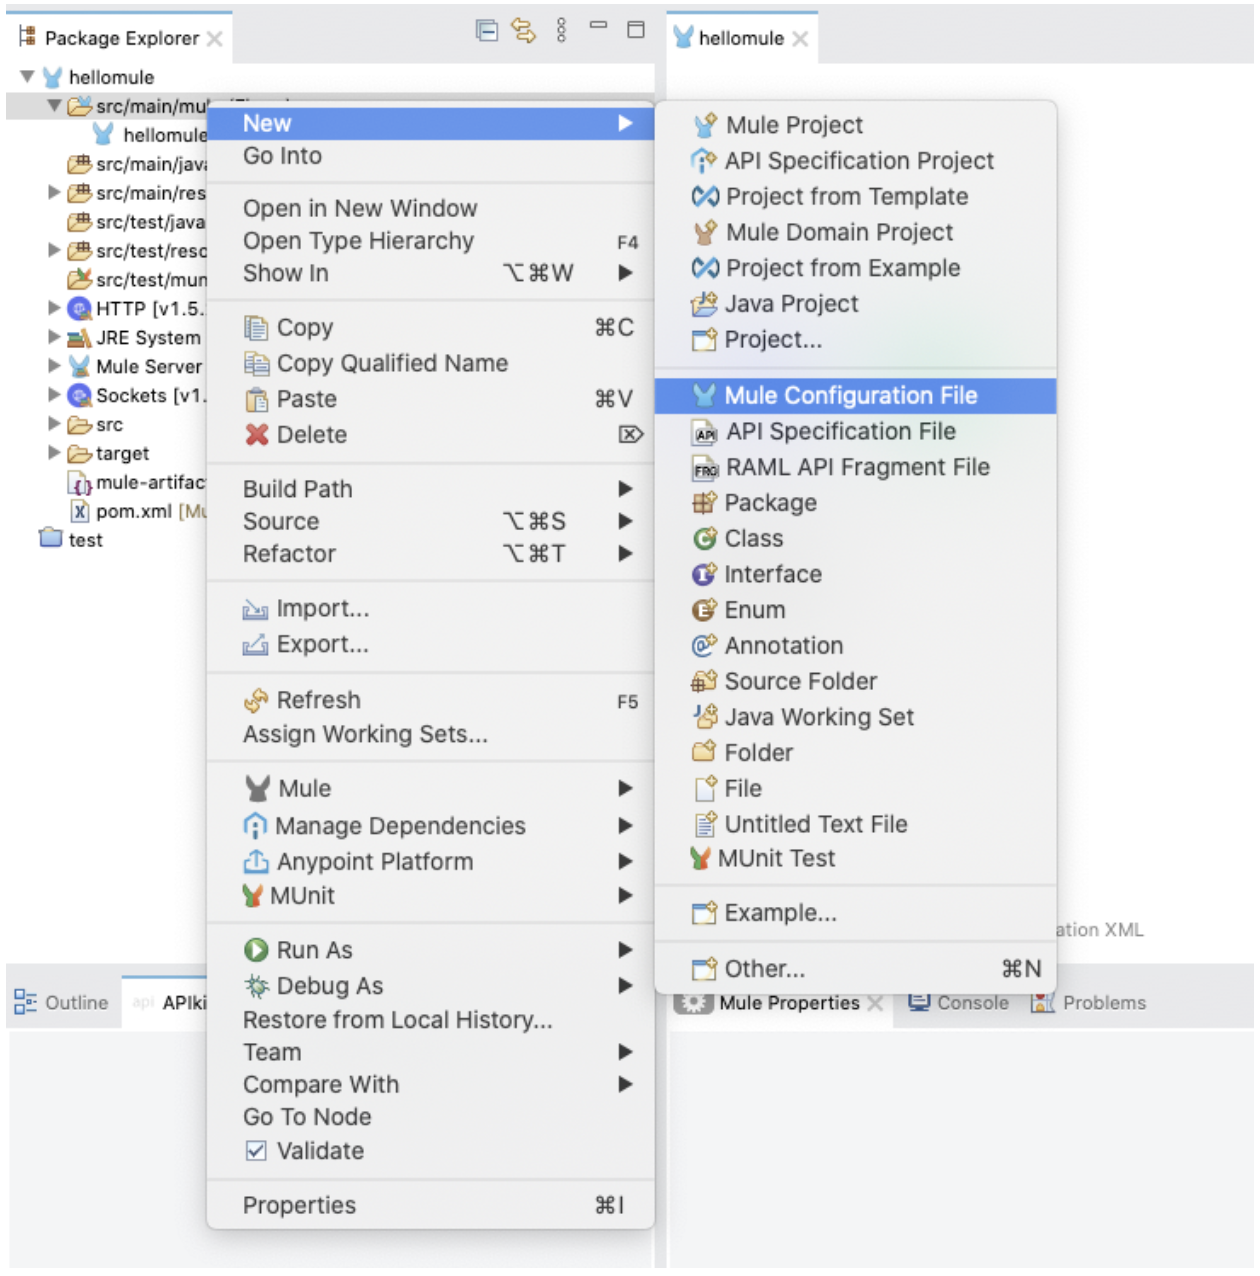
- Right-click on your project in Anypoint Studio.
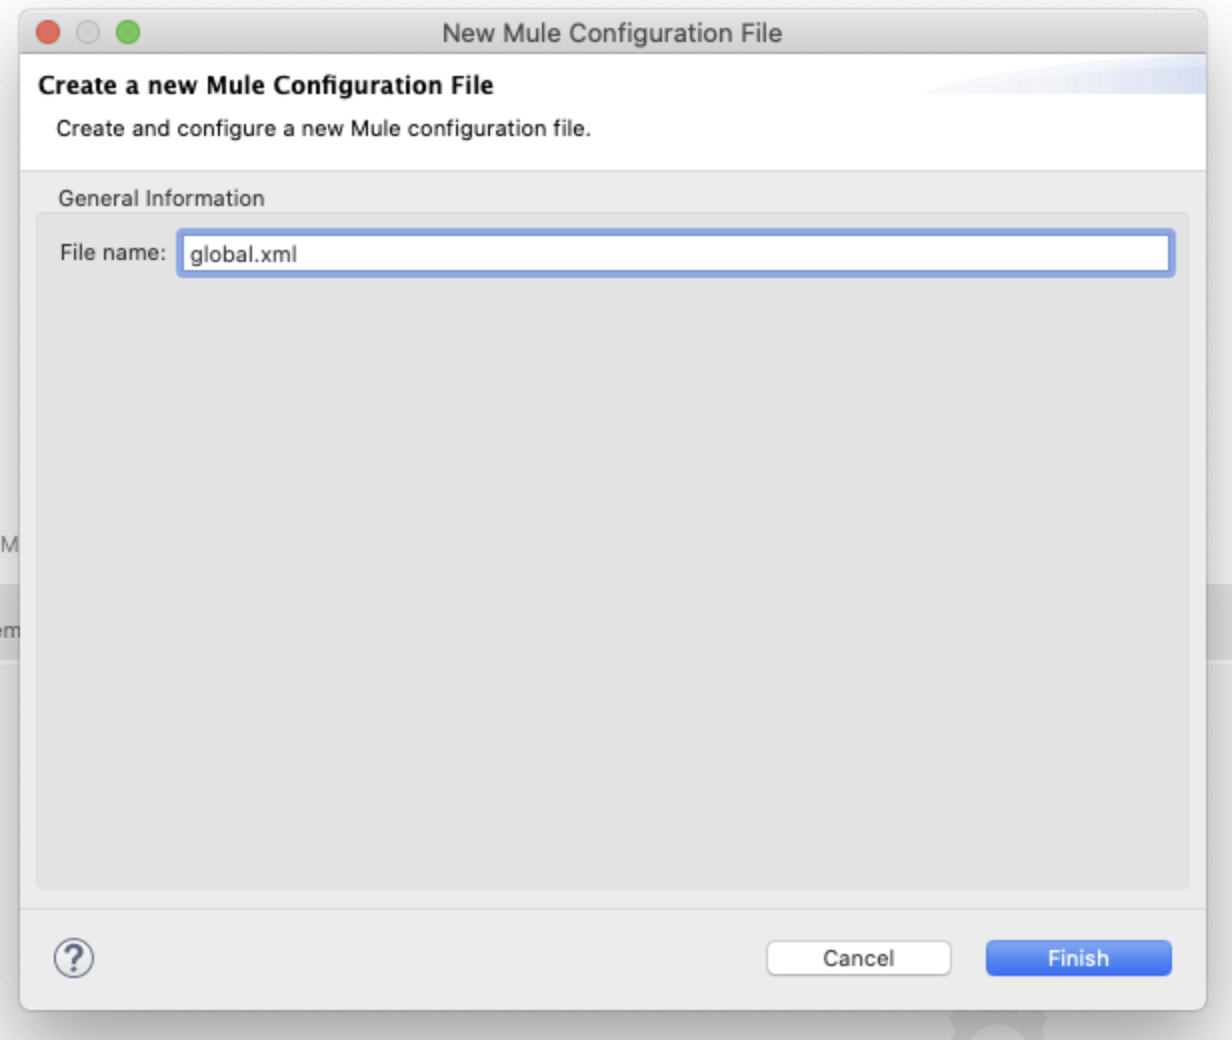
- Select "New" -> "Mule Configuration File" and name it descriptively (e.g., global.xml)
2. Define Global Elements
- In the visual editor, add elements from the Mule Palette like HTTP Listeners, Database Connectors, etc.
- Configure each element. Many properties can be references to values in your properties file.
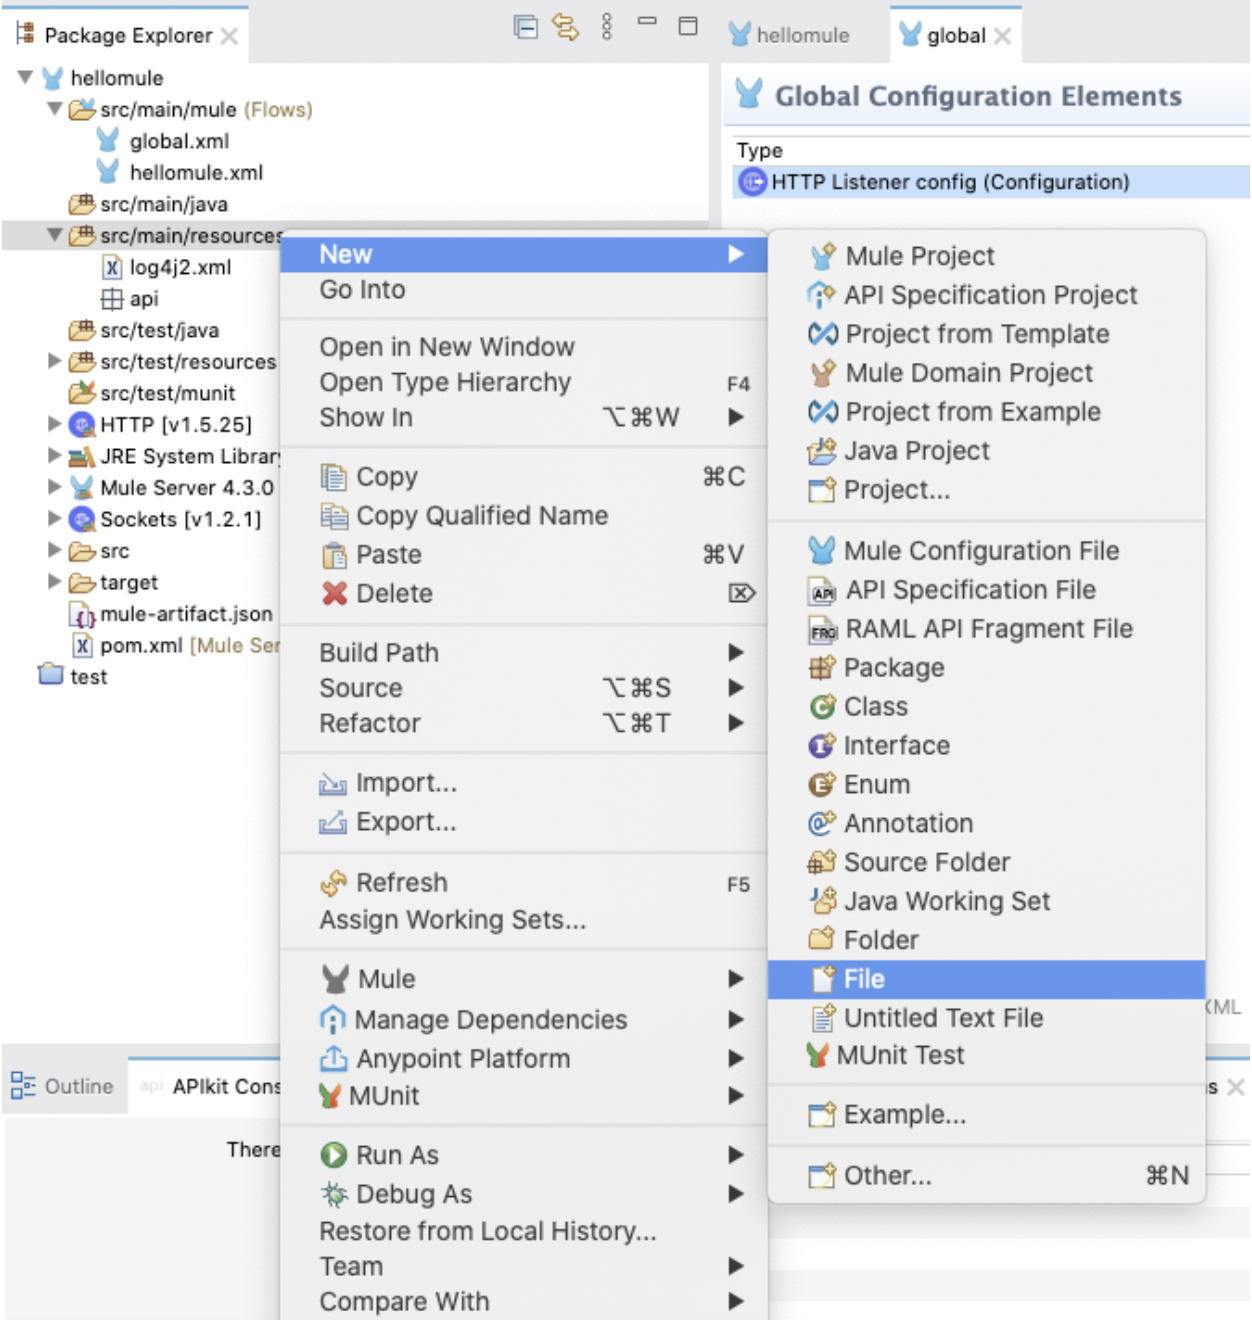
3. Create a Properties File:
- Right-click on the
src/main/resourcesfolder of your project. - Select "New" -> "File" and name it (e.g., dev.properties)
4. Populate Your Properties File:
- Use the format
key=value(e.g.,database.url=jdbc://localhost:5432/myapp)
Using Your Configurations
- Reference Global Elements: Drag and drop elements from the 'Global Elements' section of the Mule Palette into any flow.
- Reference Properties: In your flow's components, use the
${property.key}syntax (e.g.,${database.url}).
Example
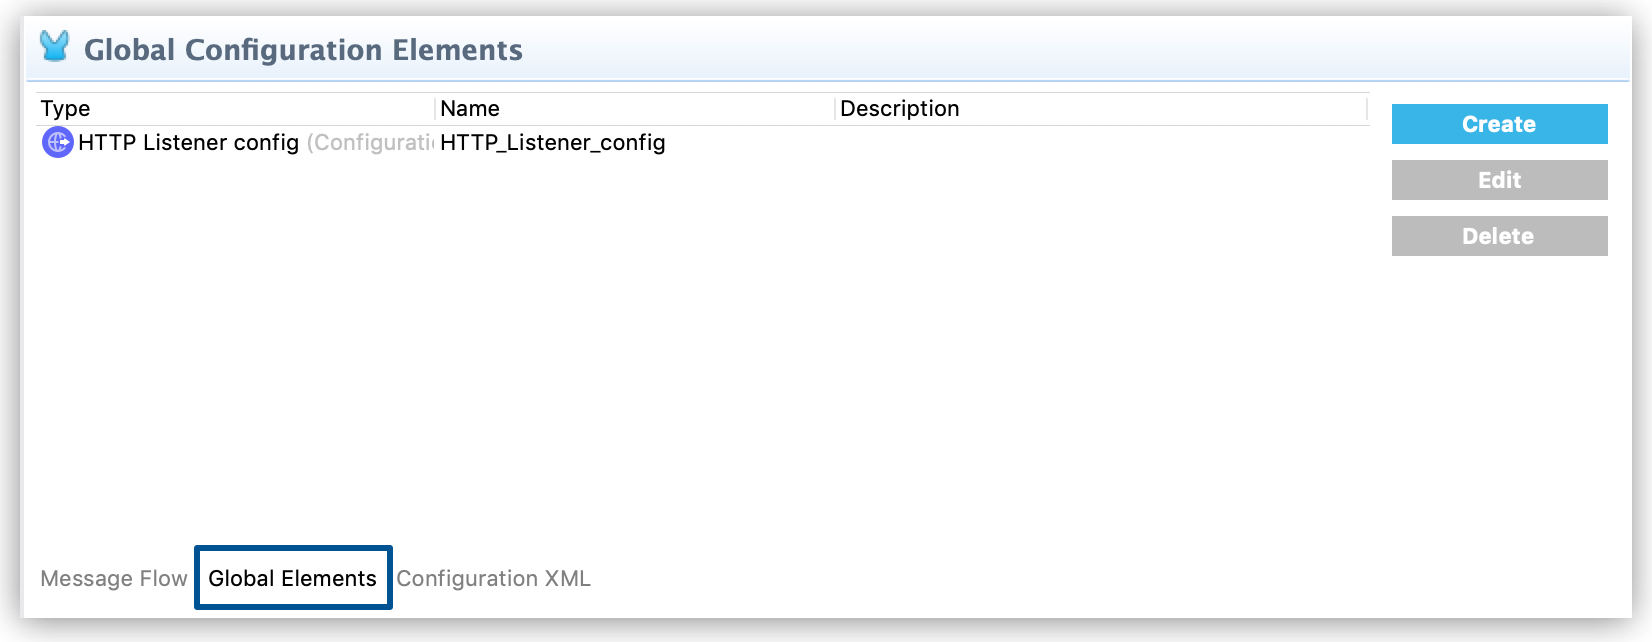
In the global.xml file, switch to the Global Elements view.
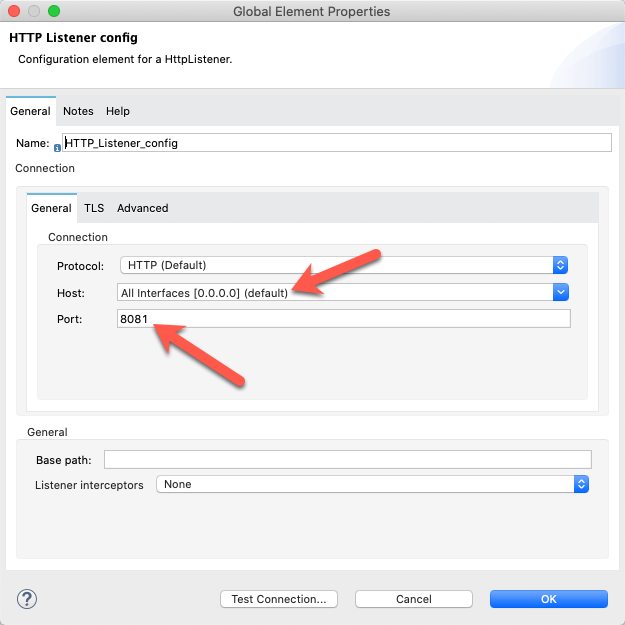
Select the HTTP_Listener_config element and click on the Edit button to the right or double-click it. Remember the default values for the Host and the Port? These are hardcoded values. This means that whenever we want to change them, we have to find the correct element and edit it. Maybe it’s not hard to do right now because we only have one global element, but this becomes an issue in bigger projects.
To avoid having hardcoded values in our code, it is a best practice to externalize them into properties files. Right-click on the src/main/resources folder and select New > File.
There are two types of supported properties files:
.properties.yaml
There is no best practice to use one or the other, it depends on your preference. The main difference is that .properties files are easier to copy/paste, but the .yaml properties are cleaner to look at. For the purpose of this tutorial, we will be using .properties. You can read more about them in the MuleSoft docs.
Create a local.properties file under src/main/resources.
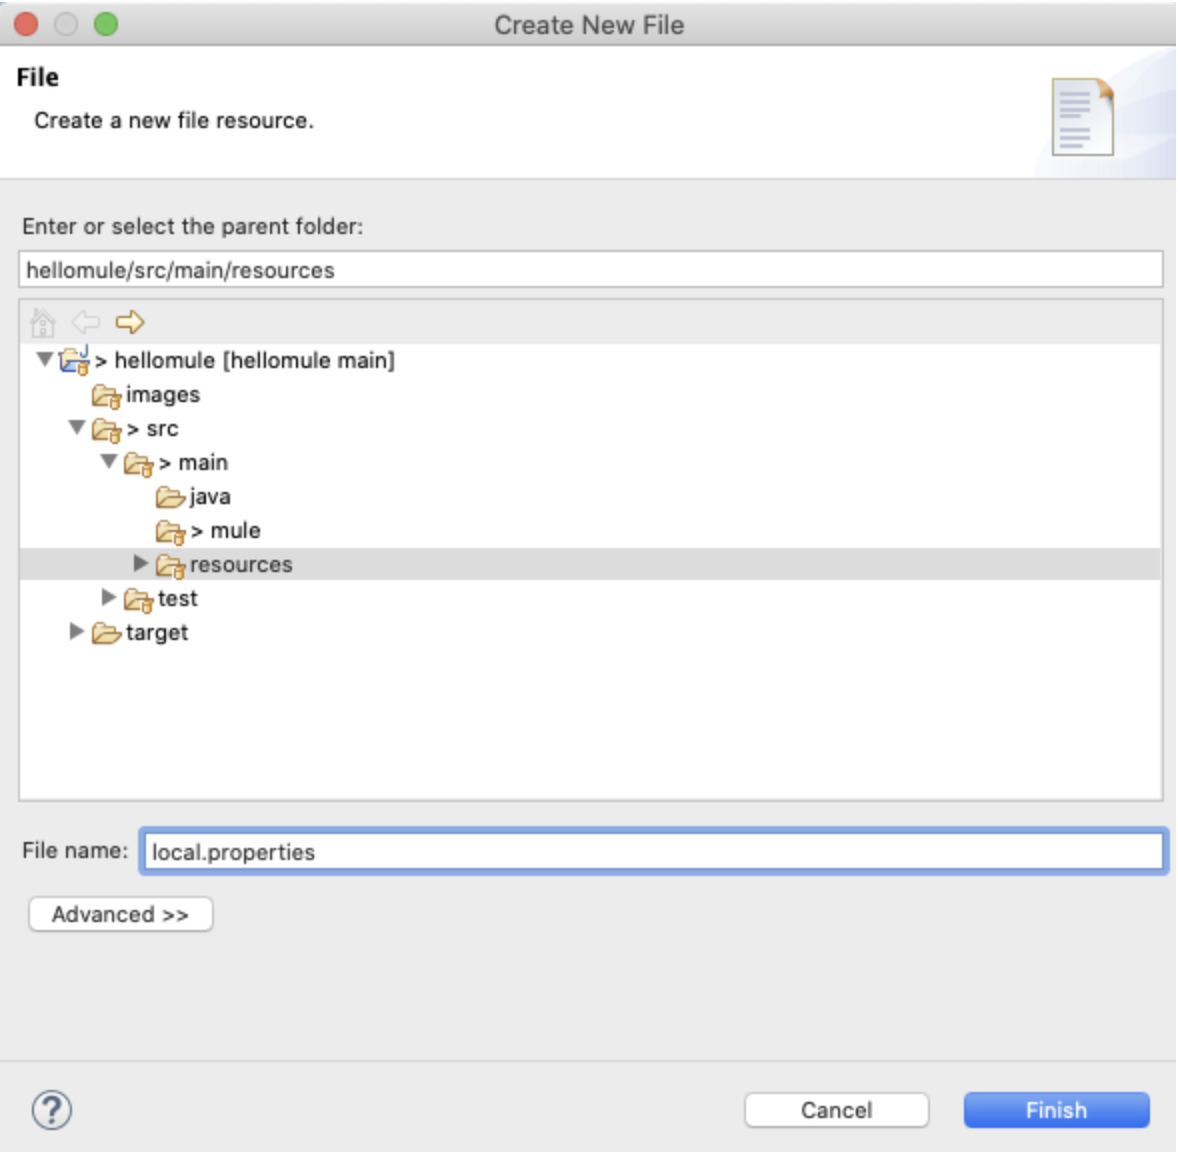
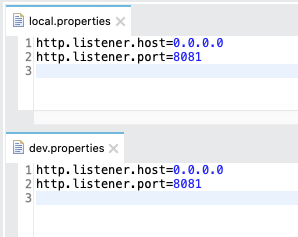
Inside this new file, copy and paste the following properties and save the file:
http.listener.host=0.0.0.0http.listener.port=8081
Repeat the same steps for a dev.properties file. This helps us separate the properties per environment. When we run our Mule app on our local computer, we’ll be using the local.properties file. When we deploy our application to CloudHub, we’ll be using the dev.properties file. In this case, both properties have the same values. But it’s a good practice to separate your properties files by environment.
Go back to the global.xml file and switch to the Global Elements view. Select the HTTP_Listener_config element and click on Edit. In order to refer to a property from any connector configuration, you need to use the following syntax:
${your.property.name}
Replace each hardcoded value with the corresponding property, using the previous syntax. You should end up with something like this:
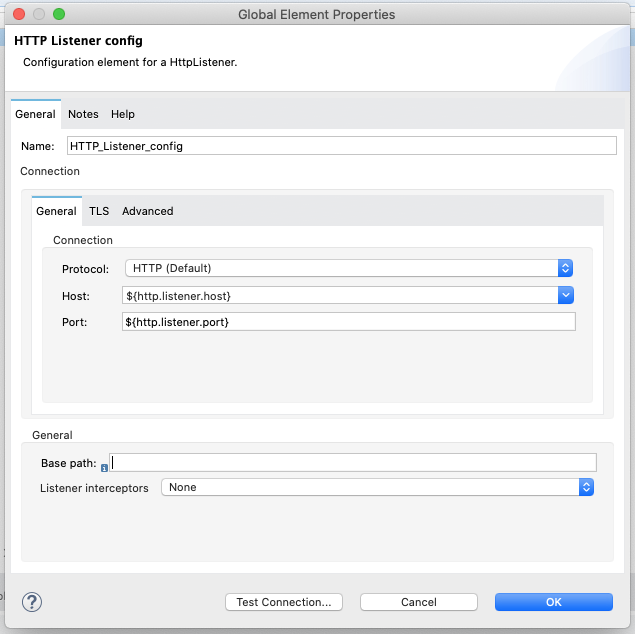
Click OK and save all files.
Additional Tips
- Naming Conventions: Use clear names for global elements and properties.
- Environment-Specific Properties: Create separate files (e.g., dev.properties, test.properties, prod.properties) and control which is used during deployment.
- Secure Properties: For sensitive data, consider tools to encrypt your property files.
Conclusion
Global elements and properties files are essential for well-organized and scalable MuleSoft projects. By following these steps, you'll simplify your workflow and gain greater control over your configurations.
No comments yet. Login to start a new discussion Start a new discussion